Archives: Products

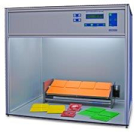
MATCHMASTER 425 MC

Microprocessor controlled color comparison cabinet. Automatic operation based on manually preset program sequences. 3 types of illuminants: A, D65 and TL84. Facility for adding UV light to clarify response to the fluorescent effect. Control panel with foil pad keyboard and LCD. Display of operating hours and number of switching cycles for each light source. Accessories: Pivoting specimen table, light diffuser.

Glossmeters- Models 560MC-X, 560MC-XS, 562 & 503

1-angle, 2-angle and 3-angle, 60°, 20° and 60°, 20° and 60° and 85°, portable.

Model 560 versions are single angle of 60 degree geometry and in acc. to ASTM D 523, DIN 67530, EN ISO 2813 and  ISO 7668.  The MC-XS capable for measurements on small specimens (3mm aperture).

Model 562 is a two angled version of 20 and 60 degree measuring geometry; in acc. to ASTM D 523, DIN 67530, EN ISO 2813 and  ISO 7668

Model 503 is a three angled version of 20, 60 and 85 degree measuring geometry; in acc. to ISO 2813, ISO 7668, ASTM D 523, ASTM D 2457, DIN 67530, JIS Z8741

Glossmeter Facility ONLINE Model 507

2 optional angles, separately, 20° + 60°, can be individually positioned

GLOSSMASTER ONLINE 507-60°

Now, more than ever, it is very important to achieve a consistent surface quality during the production and processing of surface-treated materials (such as papers, plastics, metal or wood surfaces). A uniform and defined surface quality must be ensured in almost all industrial segments. Variations in glossiness can result from manufacturing defects, supplier changes and material fluctuations. Often, these lead to complaints in quality control or even rejection of the material. Especially in recent years due to increasing demands of customers, it is particularly important to be able to make a flawless, objective assessment of the gloss. In acc. to EN ISO 2813, DIN 67 530, ISO 7668, ASTM D 523.  (Version 507-60A available with automatic calibration)

Kempf Chalking Tester 241

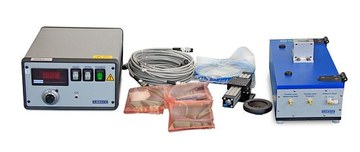
Damp photographic paper is pressed by a rubber pad under defined force onto the film surface in accordance with DIN 53 159. Evaluation of chalking mark by comparison with sample scale.

Washability and Scrubbability Tester 494MC

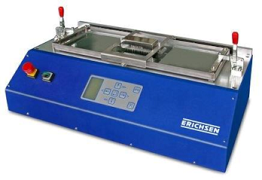
Operation via keyboard and display adjustable stroke rate and stroke path Parameter storage for 20 test cycles up to 3 tests simultaneously.  For the assessment of the washing and scrubbing resistance as well as cleanability of dispersion paints (specifically ”wall paints”)., The wide range of its adjustable parameters allows also some further tailored/customized testing matters (for example for testing cleaning agents/solutions, etc.) as well. In the above standard applications a matt black PVC foil will be coated, and – if required – soiled in a defined manner. After clamping into the device it will be exposed under the influence of a washing liquid the stress of the moving scrub body.DIN 53 778-2 ASTM D 2486 DIN EN ISO 11998

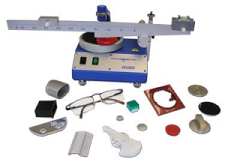
Original Taber Abraser 352

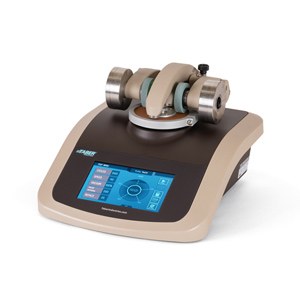
The TABER® ABRASER 352 D (Platform), with its attractive and modern design, is a robust tabletop unit. The precise control and drive elements are located in a sturdy aluminum housing. Easy operation is via LCD touch screen, with functions such as abraser status, visual reference of completed test, cycle/time switching (completed or remaining), programmable pause interval, language selection and much more. The TABER® ABRASER Model 352 D (Type 1750) has two specimen holders for performing abrasion tests.

Purpose and application: Resistance to abrasion is one of the most important mechanical properties of surfaces. Among the methods used to test abrasion resistance, working with this unit is the most common and widely used method. Numerous national and international standards make explicit reference to this test instrument. The Original TABER® ABRASER can be used to perform abrasion tests on paintwork and other coatings, such as rubber, paper, leather, ceramics, textile fabrics and metals. This device is used in research and development as well as in production and quality control.

Principle of the test: The abrasion is caused by two friction rollers which act with a defined force on the rotating specimen holder to which the specimen is attached. An essential feature of these abrasion tests is the X-shaped grid.  In acc. to EN 13329, NEMA LD 3-2000, EN 438-2, ISO 4586-2, NALFA LF-01
Mar Tester 435 & 435S

Pocket instrument for scratch resistance (mar resistance) of painted or plastic surfaces. Test body (plastic, copper or steel disc) is applied with a pre-set force and drawn across the test surface. Spring force 0 – 20 N divided into 3 measuring ranges.  (Model 435S for adhesion testing)

Universal Scratch Tester 413

Scratch tester for surfaces, extremely finely graduated (0.01 N steps), with various test tips.  All methods that can be used with the SCRATCH HARDNESS TESTER 413 are basically based on the same method: The sample is mounted on a rotating table (number of revolutions in the standard version: 5 min-1). The test tool is attached to a load arm with adjustable weight that allows the tool pressure to be adjusted to the sample (load range of 0 – 10 N in 0.1 N increments and load range of 0 – 1 N in 0.01 N increments). The resistance of the sample to this effect is assessed visually using the scratch track (refer to the operating instructions for details).

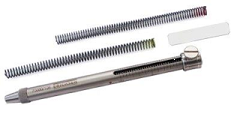
Hardness Test Rod 318 /318S /318C

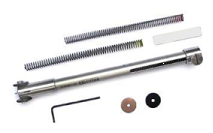
This successful and extremely useful scratch hardness tester is in the form of a pocket instrument. Also for tests on curved surfaces. Carbide ball tip, diameter alternatively 0.5/0.75/1.0 mm. Spring force 0 – 20 N divided into 3 measuring ranges.  (Model 318S designed with rolling head)  This instrument has been designed for the measurement of the hardness of protective coatings. The degree of hardness of paint films, plastic coatings, etc. can be accurately measured and recorded with the Hardness Test Pencil, Models 318, 318 S and 318 C, no matter whether on a level or curved surface, small or large.

Pendulum Hardness Tester 299/300

Damping of the oscillations of a pendulum resting on the coating material in accordance with the standards. Konig and Persoz pendulum interchangeable. Dust cover included in the basic unit. Optional accessories: Opto-electronic counter with acoustic signal at test end with manual or automatic deflection of pendulum.