Archives: Products

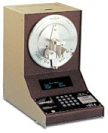
Taber Stiffness Tester 362

Precision instrument for measuring bendability in accordance with standards for flexible materials (metal and plastic foils, cardboard, paper etc.; max. thickness 3 mm). Outstanding good measuring accuracy (up to 0.1 %) achieved with motorized measuring process. Analogue and digital versions available, with accessories covering a total measuring range of 0.01 – 10.000 Stiffness Units.
Conical Mandrel Bend Tester 312

To establish the limiting extension of coating materials on sheet metal specimens by bending around a conical mandrel (1/8″ – 1 ” or 3 mm – 38 mm dia.). From the diameter of the mandrel at the point where the crack starts, the maximum relative extension of the coating can be calculated. With quick-clamping device for faster operation.

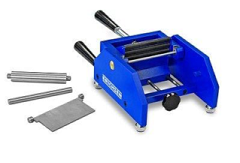
Cylindrical Mandrel Bend Tester 266-S

Lever-type instrument for testing the flexibility and the adhesive properties of coatings when these are subjected to bending stresses. With 14 easy exchangeable mandrels (diameter 2 – 32 mm). Testing with the cylindrical mandrel bending tester determines the greatest cylinder diameter at which a coating will show cracking or flaking subsequent to bending. Model 266 S allows the testing of samples up to a width of 100 mm.

MINITEST 725-735-745

Non-destructive coating thickness measurement on steel (F) and non-ferrous metals (N), measuring sensors up to 15 mm (F) and 7 mm (N) The MiniTest is ergonomically designed and its rounded shape allows the MiniTest gauge to fit perfectly into the palm of your hand. Designed for utmost flexibility for quality control and inspections.

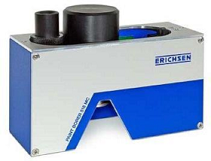
TNO Paint Borer 518MC & 518USB

Thickness measurement of all coatings on any substrate Measurement of individual layers of a multi-layer coating
Universal Thickness Measuring Instrument
  Thickness measurements in accordance with  the standardised  wedge cut method.  Combines the advantages of P.I.G. 455 with greater ease of operation: a conical bore of defined angle is made in the coating. Measuring microscope, easily and accurately focused over the cut out. Minimum specimen damage allows a large number of test points. Specimen holder for very small specimens (10 mm dia.) available.  DIN 50 986 ISO 2808 ASTM D 4138 ASTM D 5796

With the 518 USB version, connectable to a PC, laptop/WINDOWS-tablet, a convenient digitally supported way is given for visual recognition/ detection/measurement and documentation. An appropriate software is included

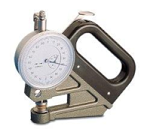
Foil Thickness Gauge 497

To measure the thickness of foils, card, paper, with and without coating. Indispensable for scrubbing resistance tests on Leneta foils and for colour and opacity measurements on contrast cards. Measuring range 1000 microns, accuracy 1 micron.

P.I.G. Paint Inspection Gauge 455

A successful instrument using the standardised wedge cut method. Indispensable for film thickness measurement on any substrate. In the case of multi layer coatings total and individual layer thickness can be measured. Measuring ranges 200/500/ 1000/2000 microns. Also for adhesion tests in accordance with AS 1580 (method 408.1).

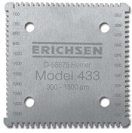
Wet Film Thickness Gauge 433

One instrument only for 4 measuring ranges: 5 – 100 microns, 100 – 500 microns, 300 – 700 microns, 700 – 1500 microns. This comb-shaped instrument, made of stainless steel, stands out for high accuracy.

Wet Film Thickness Gauge 333

Inexpensive simply operating instrument. The stainless steel “comb” with tooth lengths varying by equal amounts is applied perpendicular to the wet film and the film thickness can be read off on the last tooth that made contact with the wet coating. 3 versions with measuring ranges 120/600/1200 microns. Also available is the Model 333-S: Large version acc. to BASF for road marking paint

Wet Film Thickness Gauge 234

A hardened and ground double wheel with an eccentric cam in the middle is rolled over a newly applied film. The wetting line on the middle cam is read off on a scale as wet film thickness. Total measuring range: 1500 microns, available in 8 different sub-ranges.